What You Should Know & Do Before Starting a Design Project
In this post, I provide a review of the design process and some recommendations to consider before beginning a design project.

Me: the eager beaver excited to get to work!
*Clearly, this bright-eyed and bushy-tailed gal took this photo prior to the start of renovations.
As you may have gathered from my previous blog, I was very excited about our new home and all its potential, and I was incredibly eager to start designing. So, I didn't wait for us to move in, or even the closing date. I started once we were under contract!
Our offer was accepted the last week of May, but the homeowners did not want to close until the first week of August. This was not ideal for us as we were hoping to get in sooner and start renovations ASAP so we could have everything done before our apartment's lease was up in September. We really didn't want to move in and live in the home while it was being renovated - at least not for too long considering we wanted to work on bathrooms.
So, since we had two months until we could get back in the house (due to waiving inspections, we lost that opportunity to return before closing), I wanted to get as much done as possible during that time. This way, when the time came, and the keys were handed over to us, we would be ready to go, go, go!!!
Having only been in the house for roughly 20 minutes at the house viewing, I had limited familiarity with the home, thus some limitations in how far I could go in the design process. I had to get creative. I only took a few of my own pictures (mostly of the utility systems in the basement), but I saved all the MLS photos, which captured almost every room in the house. Plus, I had a general outline of the home from the appraisal that included exterior wall dimensions, refreshing my memory of the flow from space to space on each floor. This, along with the MLS description listing the size of each room, gave me enough to work with until I could get in there, really get a feel for each space, and measure everything myself to create an accurate and final space plan.

MLS Home Description (left) & Appraisal Floor Plan (right)
These were so helpful in creating a rough draft space plan so I could start playing with furniture layouts.
No matter your unique situation, the design process is similar.
Design Steps
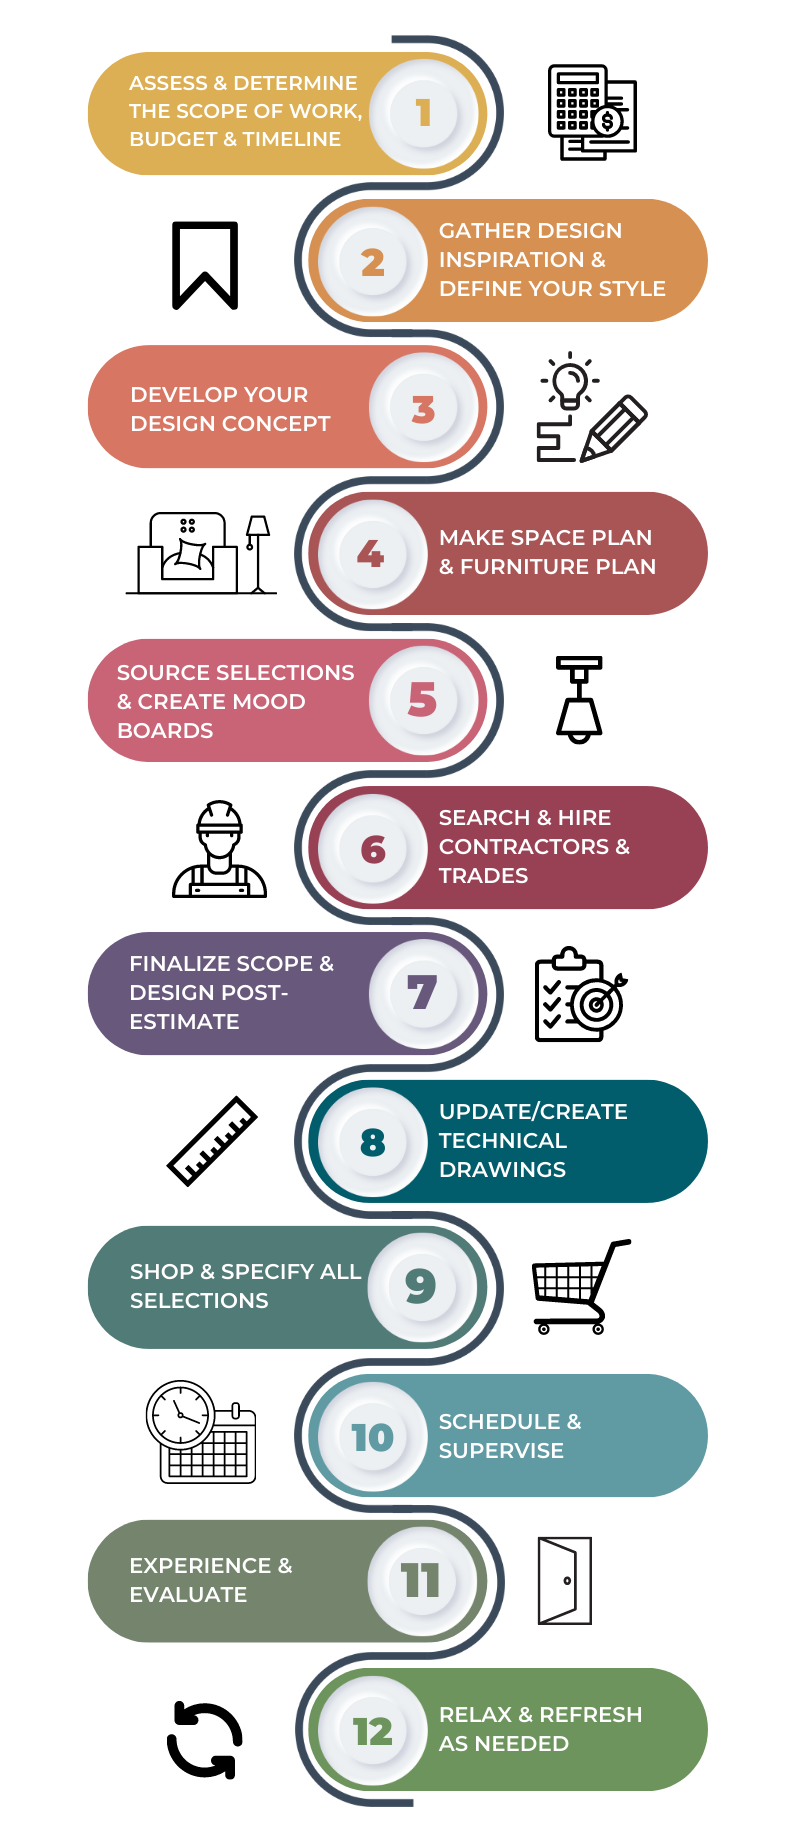
Assess & Determine the Scope of Work, Budget & Timeline
Gather Design Inspiration & Define Your Style
Develop Your Design Concept
Make Space & Furniture Plans
Source Selections &
Create Mood Boards
Search & Hire Contractor/Trades
Finalize Scope & Design After Estimate
Update/Create Technical Drawings
Shop & Specify All Selections
Schedule & Supervise
Experience & Evaluate
Relax & Refresh as needed
A couple of things to note regarding the phases of design:
If you've ever taken a design course, read a design book, searched online, or perhaps worked with a designer, then you may know that there are typically different names for the design phases (and there are fewer, combining some steps above). A majority will refer to them as Programming, Schematic/Conceptual Design, Design Development, Documentation, Administration/Implementation, and Evaluation. For my blog, I chose not to use this categorization, and instead use everyday terms that break it down into more manageable steps.
Keep in mind, that these stages are not always completed in chronological order, nor is one completely finished before another is started. Often you will jump back and forth between steps. This was especially true for me, given my unique circumstance: starting designs before I even had access to the house. However, regardless of the nonlinear nature of the design process, this outline will give you a general idea of where and how to start, as well as a basic understanding of what interior design entails.
Organization & Record Keeping

Prepare for a Plethora of Paperwork & Superfluity of Samples!
Just like with anything else (major & costly) in life, I am going to recommend you devise a system for organizing and record keeping. There are so many moving pieces in a design project - even if you’re just doing one room. So, you want to figure out a way to manage all of this. Your methods and systems should include the following:
A reference for all the designs, including:
Technical drawings (furniture plan, electrical plan, elevations, etc.)
Specifications for millwork and trim
Schedules for paint colors, doors, hardware, etc.
Selections: materials, furniture, lighting, décor, window treatments, etc.
*In an upcoming post, I will show you how I used Google Slides for this.
A list of contacts for anyone working on the project, including contractors, painters, electricians, cabinet company, etc.
Save all contacts in your phone with name, phone number, and email
Create group chats as needed
A schedule: create a calendar that details your entire timeline, including
Tasks you need to complete (design decisions, sourcing selections, design appointments, ordering, supervising)
When others are scheduled to be onsite (specify who is coming when and what they are working on) - keep everyone in the loop about any changes so everyone stays on the same page
A place to keep quotes, contracts, and receipts
You will likely need both a digital and hardcopy version - just keep them safe and available
See the Organization section of this post for more specifics on how to organize the paperwork
A place to store samples (paint chips, fabric swatches, tile samples, cabinet and countertop samples, etc.)
A tracking system for orders
As you begin to order selections, you will want to be mindful of their shipping and delivery dates so you can follow up and be available as needed (add these dates to your schedule!)
A place to store selections as they come in
Coordinate with your contractor so they know where to find things as they need them (perhaps keeping everything in the garage or a room not being used or worked on)
You may also need a place to store items others won’t need access to and that are more for the final touches (artwork, décor, bedding, etc.)
As you may see, design projects are a lot. This is why many people hire professional interior designers. Design is not just playing with pretty stuff, it is technical and it requires project management skills. If you hire a full-service design firm like I used to work for, then they will do all this for you. However, it will cost a pretty penny in addition to all the other pretty pennies spent on the design itself. So, it’s a choice you have to make between how much time, money, and effort you want to spend. Of course, even if you choose to work with a professional design firm, I would still recommend having your own record-keeping system. And if you decide not to hire a designer (or even a large contractor/construction team that may do similar project management)… Well, that’s where I (and Partridge Haven Living) come in. Consider us your guide to doing it on your own.
Other Suggestions
Two last suggestions before starting a design project:
Plan Your Place & Presence

Embrace the chaos!
But also coordinate the chaos.
Are you going to be living in the home you are renovating as the work is getting done? If so, make a game plan. What will you have access to? What will you lose access to? How will you work around this? How will your privacy be affected? Does your daily routine need adjustments? Do you need to make any arrangements (for kids, pets, work, showering, eating, sleeping)? Do you need to remove anything from the home and if so, where will you store it? How available will you make yourself to those working onsite? How often will you be onsite to check progress?
Even if you’re not living in the chaos and your daily routine will be minimally affected, you still need to plan how often you will be onsite to oversee everything and communicate with those working at your house - in fact, this is extra important if you are not going to be onsite every day to see what is happening (or not happening). So, you need to consider and communicate how you want to be contacted with any questions or concerns.
Prepare Mentally & Emotionally

My Hideaway
This is the only room in the entire house that has carpet. And it was one of the few spaces getting minimal work done (only paint, which made it unavailable for just a day). So, I came here to escape the noise and rest. Over time, I added lovely touches, such as the pillows and blanket.
Renovations are stressful and exhausting. Wrap your mind around this and prepare some stress-relievers to engage as needed. Yes, that’s right, this former therapist is telling you to create a wellness plan. You will need it. Breaks and getaways are mandatory not only for your sanity but for the success of the design. If you are overwhelmed and sleep-deprived you may make poor decisions or miss mistakes by others that will haunt you later. Take care of yourself!

Treat yo’self!
Hard week? Soft serve!
I hope that helps provide a review of what a design project entails and how to approach it. In future blog posts, I will be going into more detail about the steps listed above. And if you have any questions about this blog or an upcoming/ongoing project of your own, don't hesitate to ask. As I like to say, consider PHL a part of your creative community. Let's design and discover together!